How to create Apple HomeKit scenes and automations

- By: Ashley Saunders | Apple
- PUBLISHED: 27th May 2023 | LAST UPDATE: 29th August 2023
A reason for automating your home with the Apple HomeKit system is being able to programme it to complete tasks without you needing to press a button. You can create HomeKit scenes and automations with ease from the Home app.
Imagine waking up every morning as your bedroom light automatically brightens and the curtains open without pressing a button or uttering a word. That’s the power of automations!
You can even create a scene that activates multiple devices at the touch of a button. The classic is a movie scene. After pushing the movie button in the Home app, your living room’s curtains close, the light dims, and your Apple TV switches on and starts playing your favourite movie.
All of this is possible and more thanks to Apple HomeKit scenes and automations. If it sounds complicated to set up or programme, there’s good news. The Home app makes it easy to set these things up, and you don’t need a computer PhD or be a geek!
Come with us as we explore how to create HomeKit scenes and automations using your Apple iOS device and the Home app. Your life will never be the same again.
Here’s what you need to get started
- Home Hub (here’s how to set up a home hub)
- Home App on your iOS device (update your iPhone or iPad to the latest iOS version)
- HomeKit Smart devices and add them to the Home app.
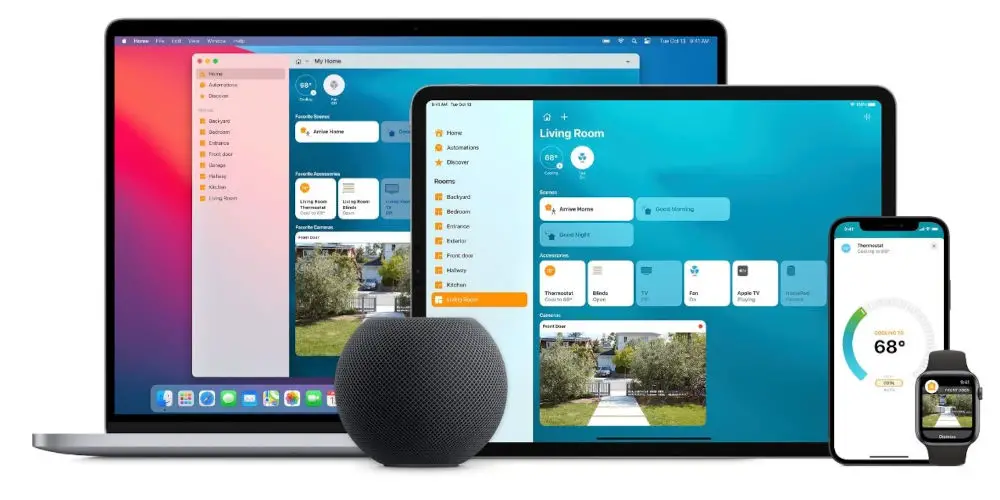
photo by Apple
How to create a HomeKit scene using the Home app
Smart home scenes are powerful. They allow you to control multiple devices with a single button press. You can even preset settings, meaning the system remembers, and you don’t have to!
Ideal if you like to dim the bedroom light to 35% and don’t want to always mess around finding the right setting. You can programme your HomeKit scene to remember! It’ll work like magic.
You can create a scene called “Good Night” that turns off all of the lights and locks the front door, and all at once. Another classic is a “Morning” scene that plays your favourite playlist on your HomePod, Apple TV1 or AirPlay-enabled speaker.
The Home app allows you to create HomeKit scenes using two methods suggested or custom. We recommend starting with suggested scenes. Built by Apple, they allow you to experience simple automations. From there, you can create custom scenes as you get more comfortable.
Use a suggested scene
- In the Home app, tap the Add button
- Select Add Scene
- Choose a suggested scene
- Tap a device to adjust its settings
- Add or remove devices included in the scene by taping Add or Remove Accessories
- Preview the scene by tapping on Test This Scene
- When you’re happy, tap Done.
Create a custom scene
- In the Home app, tap the Add button
- Select Add Scene
- Tap on Custom
- Name your scene
- Tap Add Accessories
- Choose the accessories you want to add
- Tap Done.
That’s the basics of creating a custom scene in the Home app. To modify it, follow these steps:
- Tap on a device to adjust its settings
- Add or remove devices from a scene by tapping on Add Accessories
- Preview your scene by tapping on Test This Scene
- Tap or click Done.
Quickly edit a scene on your iPhone or iPad by pressing and holding the scene’s name. Next, tap Edit Scene. On your Mac, double-click a scene to edit it.
To activate a scene, tap or click it. You could ask Siri or even automate when it runs by installing and using a home hub.
photos by Apple
Creating automations in the Home app
After creating HomeKit scenes, the next step is to programme your system to run them automatically. You’ll need to set up a home hub to do it. With that installed, you can trigger an accessory or scene based on the time of day, your location, sensor detection, and more.
You could create an automation that triggers a Wake Up scene to run on weekdays at 7 am. The automation slowly dims your bedroom light up and opens the blinds, and you gently wake up.
Another great automation to try is to turn on the light in your downstairs toilet when a motion sensor detects movement. You and your guests will never need to find the light switch again. Plus, you can set the light to turn off after 15 minutes.
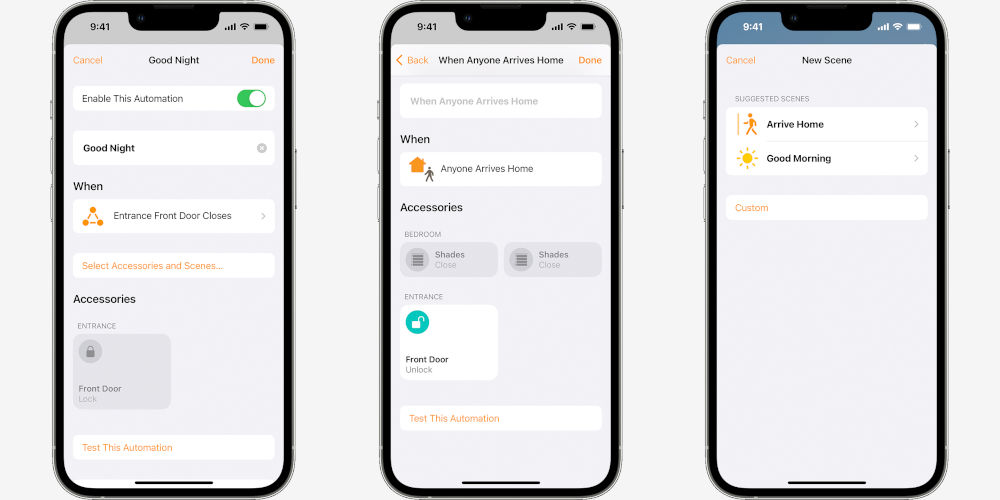
Create an automation based on a device’s action
When a device turns on, turns off or detects something, you can automate other devices or accessories and scenes to react and perform actions.
- In the Home app, tap the Add button
- Select Add Automation
- To start an automation when an accessory turns on or off, choose An Accessory is Controlled or choose A Sensor Detects Something
- Select the accessory that starts the automation, then tap Next
- Choose the action that triggers the automation, such as if the accessory turns on or opens
- Tap Next
- Select scenes and accessories that react to the action
- Tap Next
- To adjust an accessory on your iPhone or iPad, touch and hold it. On your Mac, click on the accessory
- Tap Done to save.
It’s easy to get an alert when an accessory detects something by following these steps: how to set up notifications for your accessories.
Creating an automation based on who’s at home
You can even automate your devices and scenes to turn on or off when you or a shared user arrives at or leaves your home. Very cool!
To create an automation triggered by location, you and anyone you’ve invited to control your home need to turn on Share My Location for the primary iPhone or iPad2 you use to control your home.
Go to Settings > [your name] > Find My and turn on Share My Location.
Ensure “This Device” is selected next to My Location.
- In the Home app, tap the Add button
- Select Add Automation
- Choose if you want the automation to occur when People Arrive or when People Leave your home
- To choose a specific person to start the automation, tap Information. You can also choose a location and time for the automation
- Tap Next
- Select scenes and accessories to automate
- Tap Next
- To adjust a device on your iPhone or iPad, touch and hold it. On your Mac, click the accessory
- Preview the automation by tapping Test This Automation
- Tap Done to save.
Automate devices and accessories at a certain time
Create an automation that runs at a specific time, on certain days and based on who’s at home.
- In the Home app, tap the Add button
- Select Add Automation
- Choose A Time of Day Occurs, then choose a time and day to run your action
- Tap People to set the automation to occur at a certain time when someone is at home
- Tap Next
- Select scenes and accessories to automate
- Tap Next
- To adjust an accessory on your iPhone or iPad, touch and hold it. On Mac, click the accessory
- You can preview the automation by tapping on Test This Automation
- Tap Done to save.
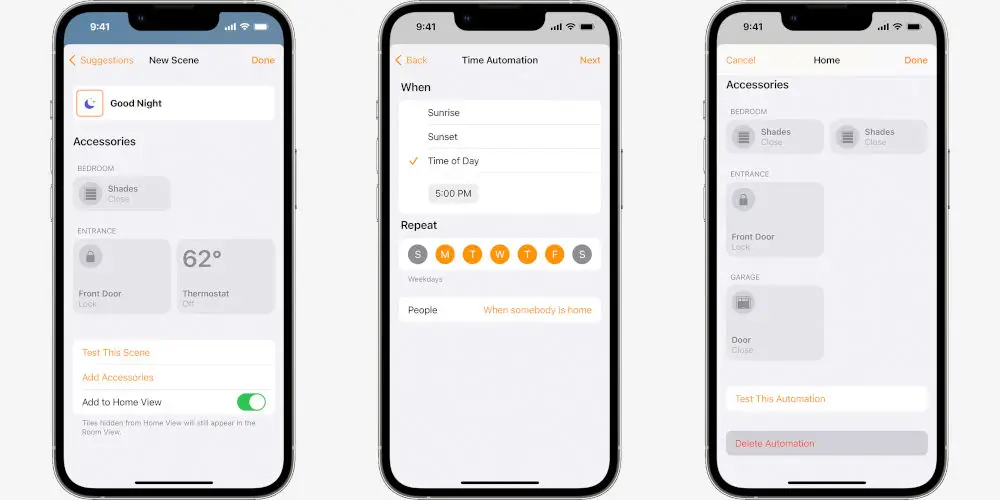
photo by Apple
How to turn off or delete an automation
If you want to enable or disable an automation you’ve built in the Home app:
- Open the Home app on your iPhone, iPad or Mac
- Go to the Automation tab
- Tap on the automation
- Turn Enable This Automation on or off.
You can also tap on Turn Off to choose the time duration to turn off accessories in an automation. For example, if you create an automation that turns on the lights when you arrive home, you can set the lights to turn off after an hour.
If you want to delete an automation, tap the automation. Next, scroll to the bottom and tap Delete Automation. On your iPhone or iPad, simply swipe left over the automation and tap Delete.
And that’s how to create HomeKit scenes and automations that will change your life! Plus, you can use your Z-Wave devices within your HomeKit system and control them using these scenes.