How the Fibaro Dimmer 2 easily turns your lights smart

- By: Ashley Saunders | Fibaro
- PUBLISHED: 2nd July 2022 | LAST UPDATE: 19th September 2023
Instantly turn your basic, boring light into a dimmable one with the Fibaro Dimmer 2 module. Its small size makes it ideal for sitting in a backbox behind your current light switch. Once installed, you can flexibly control your light using any Z-Wave system.
As a fully Z-Wave Plus certified device, it offers increased range, extended battery life and Over-The-Air upgrading (OTA). Plus, it is easily added to any Z-Wave controller without needing to move the device next to the hub for inclusion.
Beyond the simple function of letting you switch your lights on and off, the Fibaro Dimmer 2 can help lower your energy bills, allow you to build scenes with dimmed lights and even offers a fade in start function.
What is the Fibaro Dimmer 2 module?
The Fibaro Dimmer 2 (FGD212) Works with incandescent bulbs, 230V halogen, 12V halogen and dimmable LEDs. The module uses complex algorithms to detect the bulb type and adapts the dimming behaviour. It offers three different types of dimming depending on the type of bulb.
For incandescent and halogen bulbs (resistive), it uses trailing-edge dimming. With LEDs and other resistive-capacitive bulbs, it uses trailing-edge dimming. Finally, with transformers and other resistive-inductive loads, it uses Leading-edge dimming.
It still operates as an on/off light switch if you want basic control with automation capacities or are using a non-dimmable load. That said, you don’t need to use a local light switch if you will only control it using the app or a scene controller.
As the cost of living continues to rise, being able to monitor what you’re spending money on becomes critical to you managing your money. The Fibaro Dimmer 2 monitors and reports power uses, both instantaneous (W) and accumulated power (KWh).
A built-in auto-off timer allows you to save money by turning your light off after a pre-defined time. Ideal for downstairs toilets, where people seemingly forget to turn it off!
It supports 2-wire (no neutral) and 3-wire installations. You can also use the second switch input for controlling additional associated devices or 2-way installations. Plus, it works with various switch types, such as momentary (default), toggle, 1-way and 2-way.
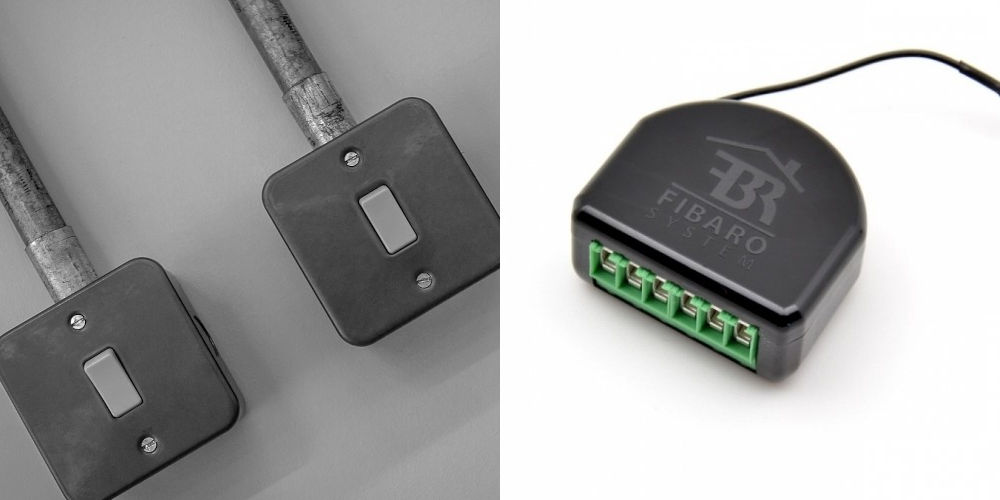
photo by Fibaro
Will you need a Z-Wave or Fibaro hub?
For your Fibaro Dimmer 2 module to work, you’ll need to pair it with a Z-Wave hub or gateway. And while you don’t necessarily need to use it with a Fibaro Home Center hub, using one ensures the best performance and options.
For example, SmartThings is compatible with Z-Wave and Zigbee. So, if you already have a Samsung SmartThings hub (either a stand-alone gateway or built-in to an appliance) installed in your home, this light dimmer module will work with your system.
Can you install it yourself?
As installing the Fibaro Dimmer 2 requires rewiring your current light switch, you need to be competent with electrics or hire someone who is. Most Fibaro devices are plug in and play, such as the Smoke Sensor, The Button and Motion Sensor, but this dimmer module isn’t.
Before attempting to install this device, turn off the power to your lights at the mains fuse box. Next, try to turn a light on to see if it still has power. If it doesn’t light up, you’re fine. Otherwise, you’ll want to re-inspect your mains fuse box and try another switch.
With the power safely turned off, you can remove the light switch from the wall and start to wire in the Fibaro Dimmer 2 module. The manual offers 8 different wiring diagrams, covering most of the possible uses.
As we’re using this device in our dining room, we can stick to the simplest wiring option. We still need a small length of 2-core wire to add the dimmer module to the circuit. With the wires correctly installed, it’s time to switch the power back on.
It takes about 30 seconds to complete the calibration process. Your light might blink during the process. When successful calibrated, the device will be turned off by default. Next, add the device to your Z-Wave network.
At this point, turn off the mains again, position the device and its antenna in the backbox and screw the light switch back in place. While you might be tempted to skip turning off the power, you could get a shock. So, spend the extra seconds to ensure your safety.

How can you use this Fibaro device?
How you’ll use the Fibaro Dimmer 2 module depends on what bulb and switch you’re using, and the level of control you want. With certain bulbs, you’ll be limited to using it as an on/off switch. Other bulbs will allow you to dim them without blowing them up!
If you have LED strip lights in your home, you’ll want to buy a Fibaro RGBW module instead of the Dimmer 2, as this is specifically designed for this type of lighting. If you want a modern looking switch with the module built-in, buy a Fibaro Walli Dimmer.
With a toggle switch, the most common light switch, turning it on/off, the Dimmer 2 will be activated always at the previously set brightness level. By turning the switch on twice in quick succession, the module will turn the light on to 99% brightness.
If you want more control, change your standard 1-gang 2-way light switch to a retractive switch. With this type of switch, it returns to the off position after being released.
Pressing it once will turn the light on to the previously used brightness level. By holding the switch down, it will brighten or dim the light. To turn it off, quickly double-click the switch.
While controlling your light using a switch is useful, you probably want to automate it using your Z-Wave Hub, in our case a Fibaro HC3 Lite. With the Dimmer 2 added to the network, you can dim/brighten it using a slider in the app.
From here, you can remotely control your light, including dimming and add it to preset scenes or automations. For example, you could create a movie night scene, where the light dims to 10%, the blinds close, and the TV turns on . With a push of a button, these actions take place.
You could also create a reading scene, which turns the light on full, allowing you to clearly see what you’re doing. Again, a single push of a button will activate this!
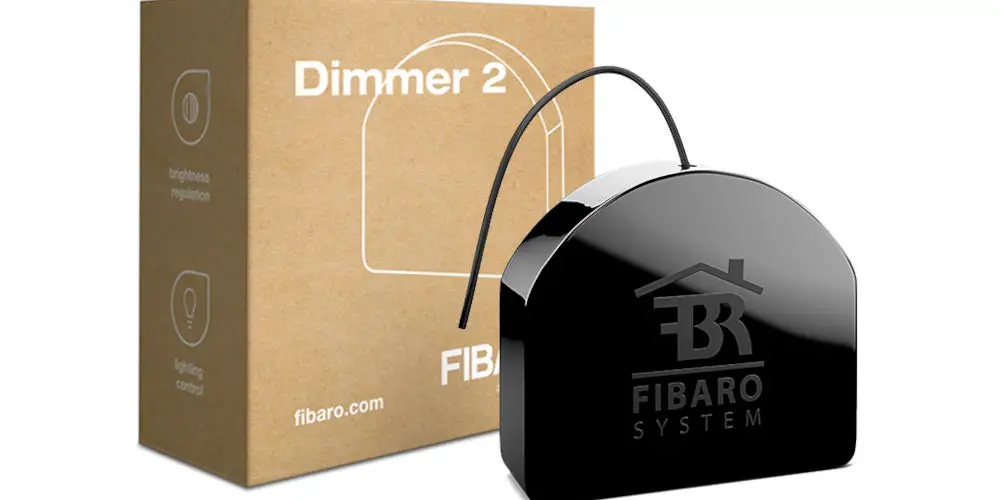
photo by Fibaro
Should you add the Fibaro Dimmer to your smart home?
There isn’t a shortage of smart light modules available, with new ones launching all the time. The Evvr Relay Switch is a good example. However, the Fibaro Dimmer 2 is far more advanced than the Evvr and only uses a single module. Plus, it’s only slightly more expensive.
You might not need to upgrade all of your lights with a Dimmer 2 module, but if you did, your home’s lighting would be highly flexible. You’d likely reduce your electric bill as you can see what lights are on and turn unnecessary ones off or dim them.
As usual, we recommend starting with a single Fibaro Dimmer 2 module. From there, you can keep adding more as you feel confident. If you don’t feel comfortable doing your own electrics, hire a professional and watch them. You’ll pick up some tips you can try next time.